
As a recurve bow shooter, you know the importance of proper technique and form in order to achieve accuracy and consistency in your shots.
One aspect of shooting that is often overlooked, however, is the protection of your fingers from the string. This is where finger savers come in.
Finger savers, also known as string protectors or finger slings, are small, padded devices that attach to the bowstring and provide a barrier between your fingers and the string as you release an arrow. These devices are especially useful for new archers or those who have struggled with finger fatigue or injury from the string.
In this article, we will guide you through the process of installing finger savers on your recurve bow, as well as provide tips for testing and maintaining these important pieces of equipment.
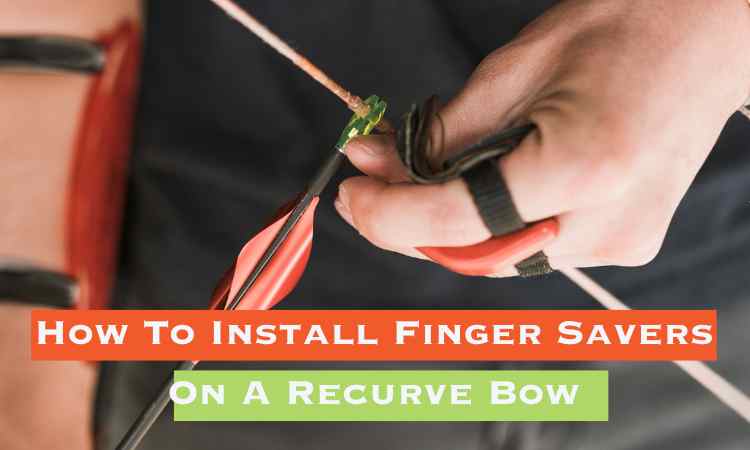
How To Install Finger Savers On A Recurve Bow?
To install finger savers on a recurve bow:
1. Slide the savers onto the bowstring. 2. Position them evenly. 3. Ensure they’re snugly fitted. 4. Adjust as needed for comfort. Enjoy a cushioned grip, reduced finger strain, and improved accuracy. Elevate your archery game effortlessly.
Here are brief answers:
Gathering the Necessary Materials
Before starting the installation process, make sure you have all the necessary materials on hand. You will need:
- Finger savers
- Bowstring wax
- String serving jig (optional, but highly recommended)
- Serving thread (optional)
- Scissors
- Razor blade or knife
You can purchase finger savers at most archery shops or online retailers. Make sure to choose a size and style that is compatible with your bowstring and fits comfortably on your fingers.
You may also want to consider purchasing a string serving jig and serving thread, as these tools will make the installation process much easier and ensure a more secure attachment.
Preparing the Bow for Installation
Before attaching the finger savers to your bowstring, it is important to properly prepare the bow and string twist. Follow these steps to ensure a smooth installation process:
Wax your bowstring. This will make the serving thread glide smoothly over the string and help to prevent any fraying or unraveling.
Tie a nocking point on the string. Ensure proper placement of the finger savers.
Set up your string serving jig, if using one. Hold the string in place and make it easier to attach the finger savers.
Cut a length of serving thread. The length will depend on the size of your finger savers and how many you are attaching. Aim for about 2-3 times the length of the finger savers.
Read It: 12 Power-Packed Best Recurve Bow Brands for Dominating Your Archery Game
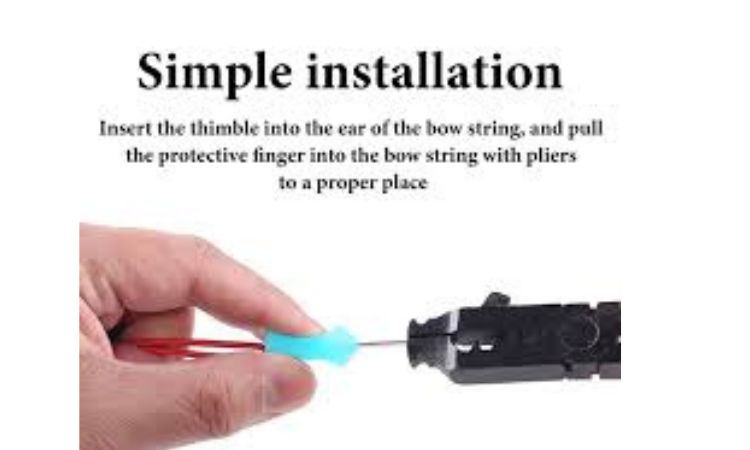
Installing the Finger Savers
Once you have gathered your materials and prepared your bow, you are ready to start the installation process. Follow these steps to attach the finger savers to your bowstring:
- Tie a knot in one end of the serving thread. This will anchor the thread to the string.
- Thread the serving thread through the eyelet of the finger savers. Make sure the finger savers are facing the correct direction and are evenly spaced.
- Place the finger savers on the string at the desired location, using the nocking point as a reference. The finger savers should be positioned about 1-2 inches above the nocking point.
- Begin serving the thread over the finger savers and string. Keep the tension on the thread tight and consistent as you wrap it around the string.
- Continue serving the thread until you have covered the entire length of the finger savers. Make sure to wrap the thread tightly and evenly.
- Tie a knot at the end of the serving thread to secure the finger savers in place.
- Trim any excess thread with scissors.
- Repeat the process for any additional finger savers.
Real Life Example:
Installing finger savers on a recurve bow is a game-changer in archery. Students like Stuart have experienced immediate comfort, improved grip, and enhanced accuracy.
The simple installation process provides a cushioned barrier between the fingers and the bowstring, eliminating discomfort and increasing control.
With finger savers, archers can achieve consistent releases, tighter groupings, and shoot with or without gloves. It’s a worthwhile investment that elevates the archery experience and unlocks true potential.
Testing the Finger Savers
After installing the finger savers, it is important to test them to ensure they are functioning properly and fit correctly. Here are some things to look for as you test your finger savers:
Comfort: Make sure the finger savers fit comfortably on your fingers and do not cause any discomfort or irritation.
Movement: The finger savers should move freely along the string as you draw and release an arrow. If they feel too tight or too loose, adjust the serving thread as needed.
Protection: When releasing an arrow, the finger savers should provide a barrier between your fingers and the string. If you feel the string contacting your fingers, adjust the placement or tension of the finger savers.
Consistency: Pay attention to how the finger savers affect your shooting technique and form. If they are causing any inconsistencies in your shots, adjust the placement or tension as needed.
Maintenance and Care of Finger Savers
Proper maintenance and care of your finger savers will ensure they last longer and continue to function properly. Here are some tips for keeping your finger savers in good condition:
Keep them clean: Wipe down the finger savers with a damp cloth or alcohol wipes to remove any dirt or grime.
Check for wear: Inspect the finger savers regularly for any signs of wear or damage, such as frayed edges or loose thread.
Replace as needed: If the finger savers are heavily worn or damaged, replace them with a new set to ensure proper protection and function.
FAQ
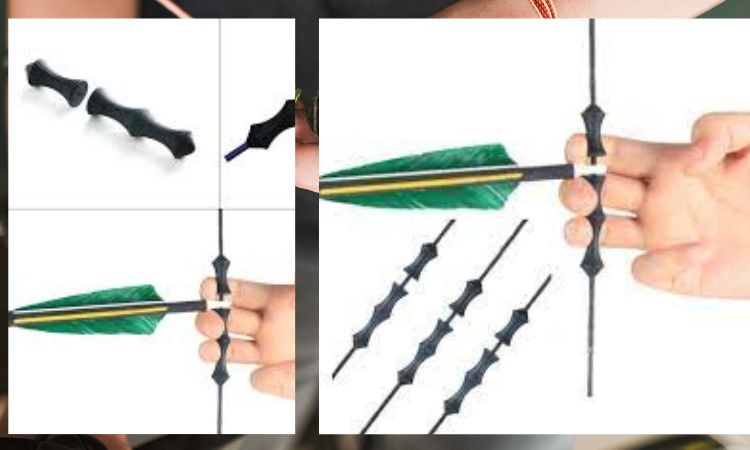
How do you put finger savers on a recurve bow?
To put finger savers on a recurve bow, follow these steps. First, make sure your bowstring is not on the bow, so it’s safe. Then, slide one finger saver onto the string where you put your fingers when you pull the string back.
Next, slide a second finger saver onto the string, just below the first one. Make sure they fit nicely and are not too tight.
After that, put the bowstring back on your bow. Adjust the finger savers so they feel comfy and even. Make sure the string is properly in both finger savers before using your bow.
How do you put on an archery finger guard?
Putting on an archery finger guard is quite simple. You wear it on the hand you use to pull the bowstring, which is usually three fingers: your index, middle, and ring fingers. The finger guard goes just above your fingertips and covers the lower part of these three fingers.
Make sure it fits snugly but not too tight. Some finger guards have straps or Velcro to keep them in place, so you can adjust it to feel just right.
The finger guard should never get in the way when you want to let go of the bowstring and shoot your arrow.
Do you need a finger guard for archery?
Finger guards can be helpful in archery, but whether you need one depends on how you shoot your bow. They have two jobs: to protect your fingers and make it easier to let go of the bowstring when you shoot.
If you use a recurve or longbow and put your fingers directly on the bowstring, a finger guard can make your fingers feel better and help you aim better. But if you have a compound bow, you might use a different tool called a mechanical release, so you don’t need a finger guard as much.
So, whether you should use a finger guard or not depends on how you shoot and what feels comfy for you.

General Manager & Auditorial Head.
Killian Jake is a World Sports Traveler and hobbyist sports lover. By exploring different sorts of playing modules like indoor, outdoor, and many more. As for professionalism and writing, it’s helpful to give you the right suggestions on different games and sports.
")


