

- Gather Materials: Get wood boards (2x4s), screws, and a saw.
- Cut Wood: Cut two 4-foot pieces and two 3-foot pieces from 2x4s.
- Assemble Base: Screw the 4-foot pieces horizontally to form the base.
- Create Uprights: Attach the 3-foot pieces vertically to the base.
- Add Bracing: Cut and attach diagonal braces for stability.
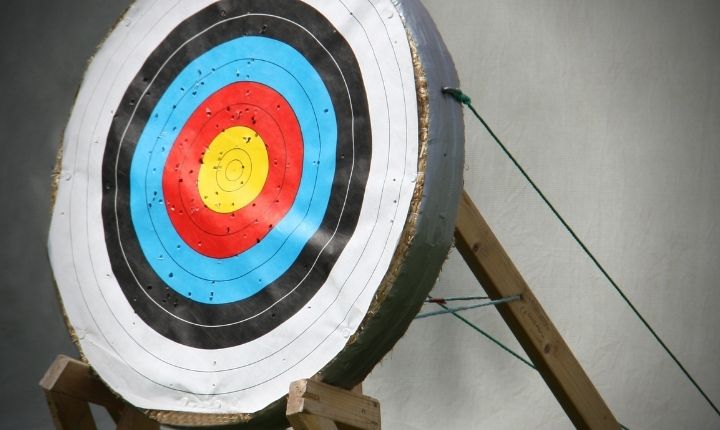
- Attach Target: Secure the target to the uprights using straps or bungee cords.
Archery is a sport that has been popular for centuries. It’s easy to see why considering how exhilarating and satisfying it can be when you finally hit the bullseye!
But before you can do any of that fun stuff, there are some things you need to know about archery target stands.
Keep reading this article if you want to learn more about what they are and how to build one.
Here in this article, we will cover up the procedure of building an archery target stand that will partially help you to organize your thoughts.
This article is also for those who want to know how to build an archery target stand at low cost and are looking for the right instructions that will help them do so.
When should you use archery target stands?
Archery target stands can be of great use to those who want to have a little fun shooting their arrows at the targets placed on them.
It’s important that people with bows and other equipment should keep in mind how they are using them so as not to provoke accidents and injury.
Archery Target stand is also useful for organizing the accessories in a definite position so that any time you can pick a bow and start practicing.
Basic equipment needed for building the archery target stands.
Before making a decision on archery target stand and ranges plans, you should look for some basic tools and accessories.
You will need a collapsible metal base for the stand and stakes to secure it, as well as some lumber in different sizes.
You should also have cables or ropes that are around 20-30 feet long (depending on how far you want your range) .
Besides You will need a drill, miter saw, and circular saw for cutting purposes.
To make your task easier, you can gather all the materials at once for building an archery target stand in one shopping trip.
The list of material is as follows:
- plywood sheets (at least 12″ x 24″)
- lumber framing pieces – studs or joists to support them (You should have enough so that every sheet of plywood has two supports),
- construction adhesive or screws depending on what type of project you are working with.
- nails (if needed)
- wood primer or paint to protect the base from moisture before applying a surface coating.
How to build an archery target stand?
When you have the basic accessories that we talked about before, now the main concern is to step-up with the task. Here are the step by step guide below-
Step-1: Making plywood sheets (at least 12″ x 24″)
Plywood sheets give you the hard and effective structure to provide the support for the archery target stand. First take the plywood sheets and make them suitable size for the archery stands.
If you can manage the size at least 12 X24 inch and then section it according to the measurement of stands and cut then it will be the top option to get the maximum output from it.
Step-2: Set the support posts.
After marking the size of plywood sheets, now it is time to make the support post. Now measure for each base post and set them on the level ground according to your measurement.
Once all posts are fixed then you can proceed with another step as per requirement
Step-3: Set it with a nail gun.
Now with the nailing gun you can fix all the plywood sheets and base posts together.
So take a nail gun to assemble it according to requirement then make sure that nails are placed in the edges of plywood sheets for better connection between them.
Step-4: make the roof trusses.
Now you need to fix the roof trusses on the top of every post. For this, now measure and cut them according to your requirement then set it with nails by placing in the edges.
You can also attach customized plywood sheets for better attachment between each other if needed.
N.B: You should always look at the base point. It is hard enough to maintain the momentum. Otherwise it could get wasted and easily uprooted from the base point.
Making an archery target to stand it the full procedure must be well maintained.
Step 5: Sheath and shingle the roof
Now, before ending the project you need to sheath and shingle the roof with plywood sheets. This is not mandatory. But check the flexibility of the archery target stand.
Otherwise it may fall down after hitting certain arrows. So carefully use the nail gun to use the nail in perfect position and edges.
Step 6: Hang the target.
Finally, hang the target. You need to carefully choose the position and height of it according to how far you want your archery to stand away from you.
And then put a safety cable that is long enough so that when people hit arrows they will not be able to reach out and touch it even if they jump in order to do so.
IF you successfully calculate the measurement then boom, you have done your archery target stand perfectly.
Related: How to make an archery target?
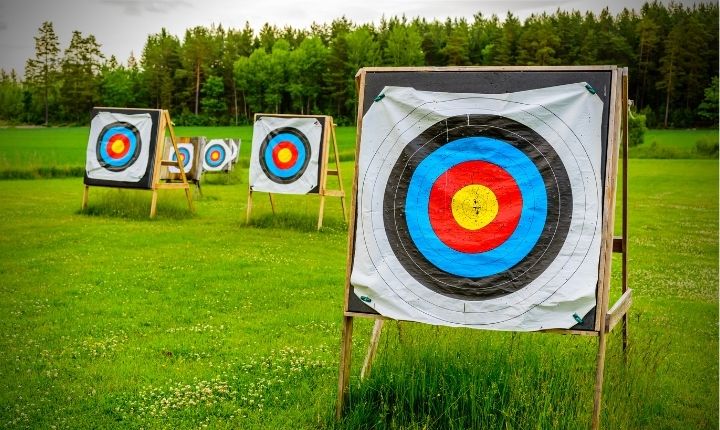
Archery Target Stand and Range Plans
When you successfully build the archery target stand then the main concern is to manage it for further use. Like how many times you use the archery target and when you want to use it.
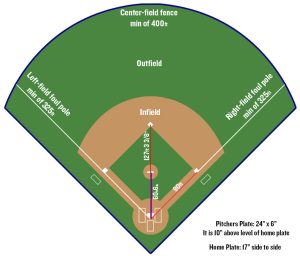
Besides, the range plans need to be considered. The distance between the target and height among the base points need to be calculated properly before making the target stand.
By the way if you make it for your children the calculation will be different.
Do you want to practice archery but don’t know when?
When should I practice my archery skills? This is a question that many people ask themselves. The answer is simple, however.
You should always be practicing your skills and honing your craft. It doesn’t matter if it’s in the morning or at night, as long as you are practicing every day then you will see improvement over time.
How to skill up with making an archery target stand?
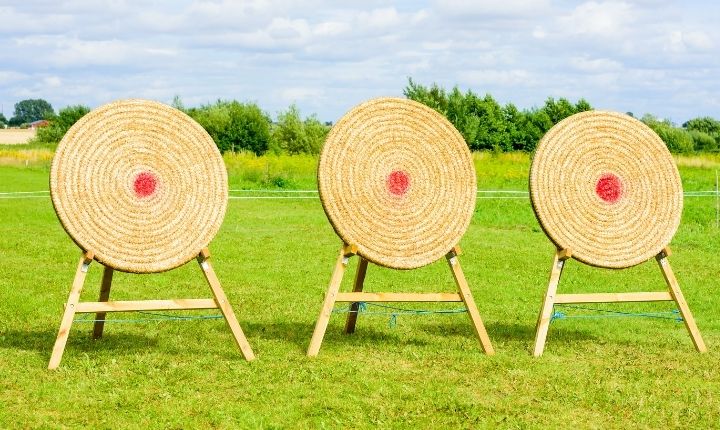
What we showed in this post , the archery stands that can be used for both indoor and outdoor use, depending on what you need.
Whether you’re looking for a stand that is easy to assemble or one with more features, we have something for everyone!
But to manage and make the better archery target stand you have to gain enough skill. But what we showed in this post is that if it is maintained like it is, the procedure will be fun and effective.
Conclusion:
It’s in the morning or at night, as long as you are practicing every day then you will see improvement over time. Practice makes perfect! So what are you waiting for? Get out there and start shooting arrows today with your own built archery target stand.
You May Also Like
These are the several Blog Post , you may need to follow. Please share your thought about the topic.


General Manager & Auditorial Head.
Killian Jake is a World Sports Traveler and hobbyist sports lover. By exploring different sorts of playing modules like indoor, outdoor, and many more. As for professionalism and writing, it’s helpful to give you the right suggestions on different games and sports.
")


